
When I am teaching photography beginners how to use their camera, they seem to have the same exact questions in the beginning of their journey.
I take it as a good sign when they ask these questions. It means that photography is starting to make sense to them.
Luckily, these questions are easy to answer and have huge impacts on how their pictures turn out.
Before you begin, if you need a better explanation of your camera settings I have two great places for you to start:
- The SUPER beginner level explanation of your camera setting
- Video tutorial on your three main camera settings
Therefore, I decided to compile these 5 common photography questions into the ultimate FAQ for beginner photographers.
Why Are My Pictures Blurry?
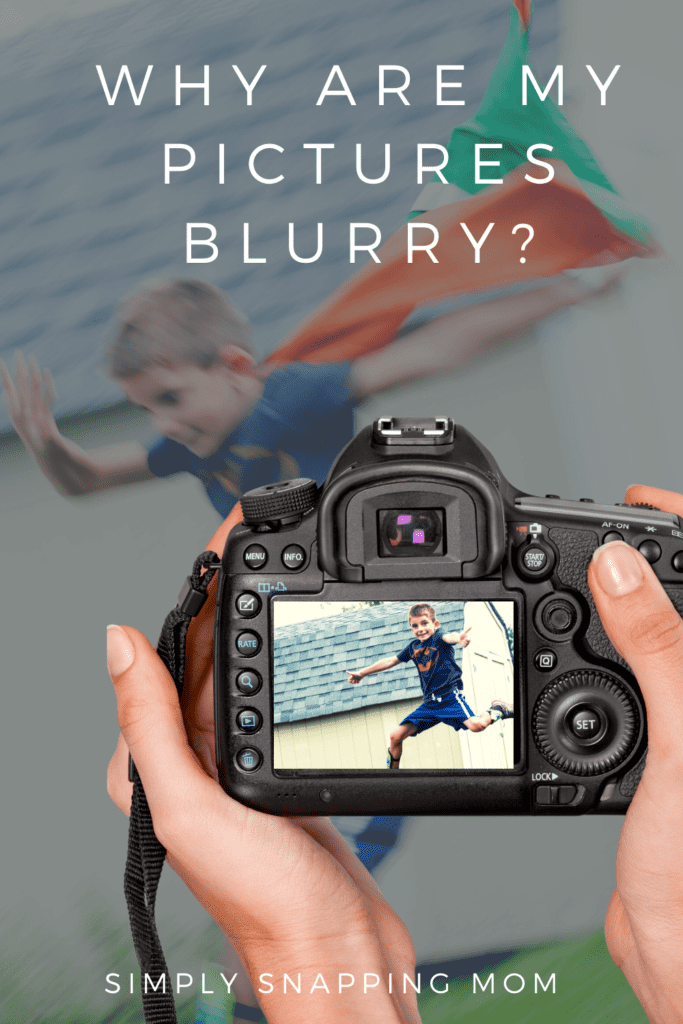
When I started using my camera, I felt like every picture I took was blurry.
The first step was getting off of auto-mode (if you need help with that, check out my links above).
In auto-mode, your camera is just “guessing” based off the lighting around you, when settings to use. The problem is, your camera often guesses wrong when it comes to settings like shutter speed- which control how your camera takes in movement.
Your camera’s shutter speed refers to how fast your camera “blinks” when you press the trigger.
- A fast shutter speed, is a fast blink – which shows as LESS movement blur
- A slow shutter speed, is a slow blink- which shows as movement blur on your picture.
This will hep you understand shutter speed better:
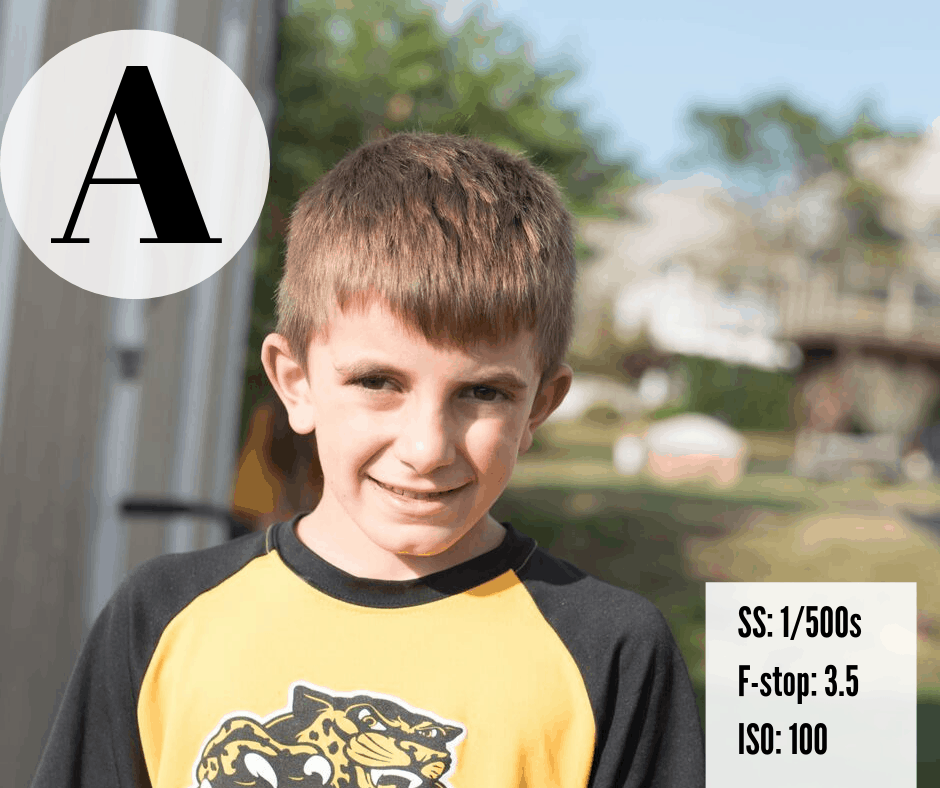
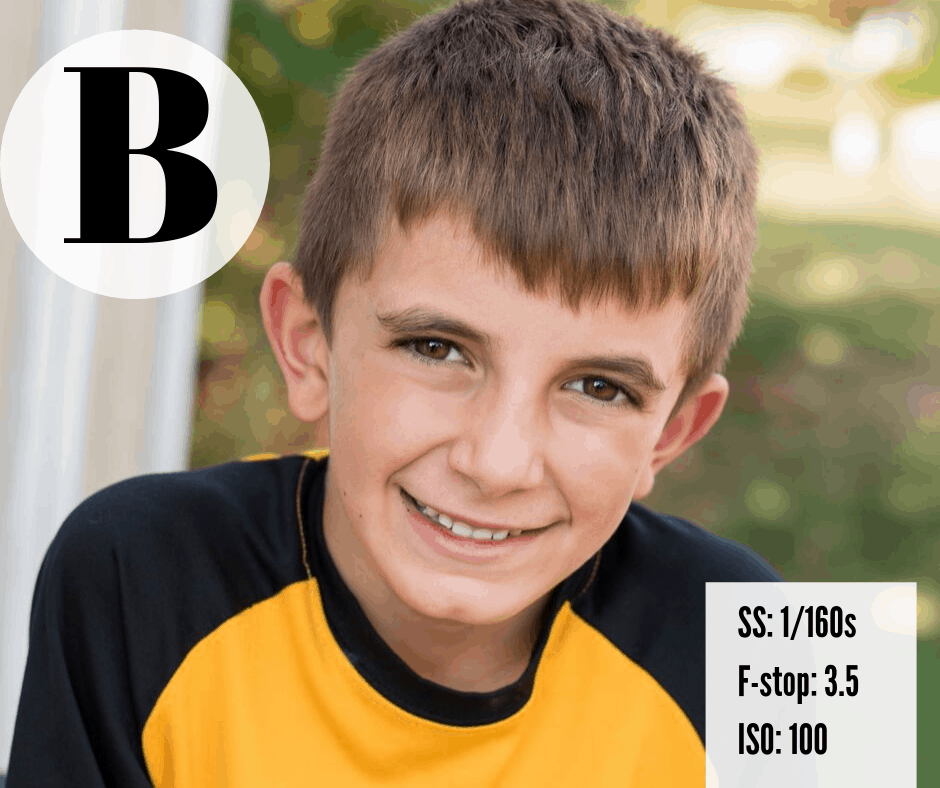
If your pictures are blurry, then you are using too SLOW of a shutter speed. Increase your shutter speed to AT LEAST 1/160 s if you are taking pictures of kids (even if they are moving slowly). For fast moving kids or objects, bump up the shutter speed to at least 1/500 s.
How do I Get Background Blur?
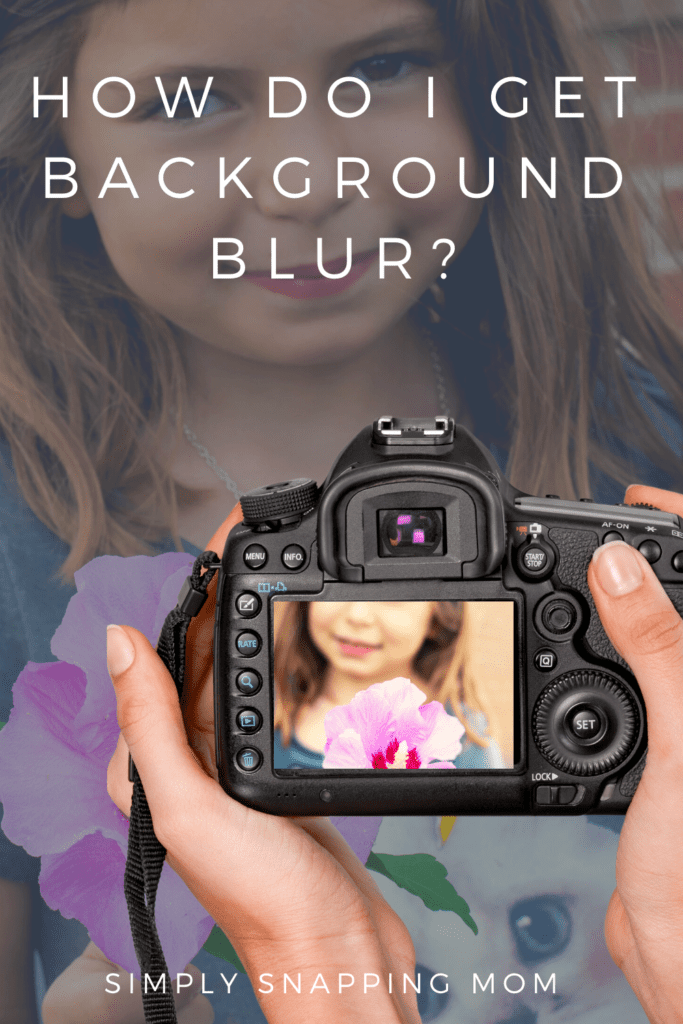
Everyone loves the background blur effect in pictures. It produces a picture that looks like what the eye can actually see.
There are two main tips on achieving background blur.
First, you have to understand how your camera interprets depth of field. That sounds like a lot of big words, but I will make it easy to understand.
Put your hand in front of your face, about six inches away and focus on it. Do you notice that anything behind your hand is blurry? You have a camera setting that controls how blurry the background is. It is called aperture and it is controlled by something called F-Stop.
It is explained here:
A smaller F-stop number will give you a blurrier background. Therefore, lowering your F-stop is the answer.
Not all camera lenses have the ability to get you a very LOW Fstop (super blurry background).
That is where the second tip comes in. You may need to upgrade your camera gear. I always recommend a 50 mm lens.
The 50 mm lens is great for portraits and getting that blurry background effect. I use it for almost every picture I take. Check out some here:
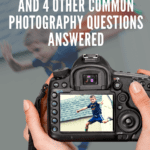
Why are My Pictures Too Dark or Too Light?
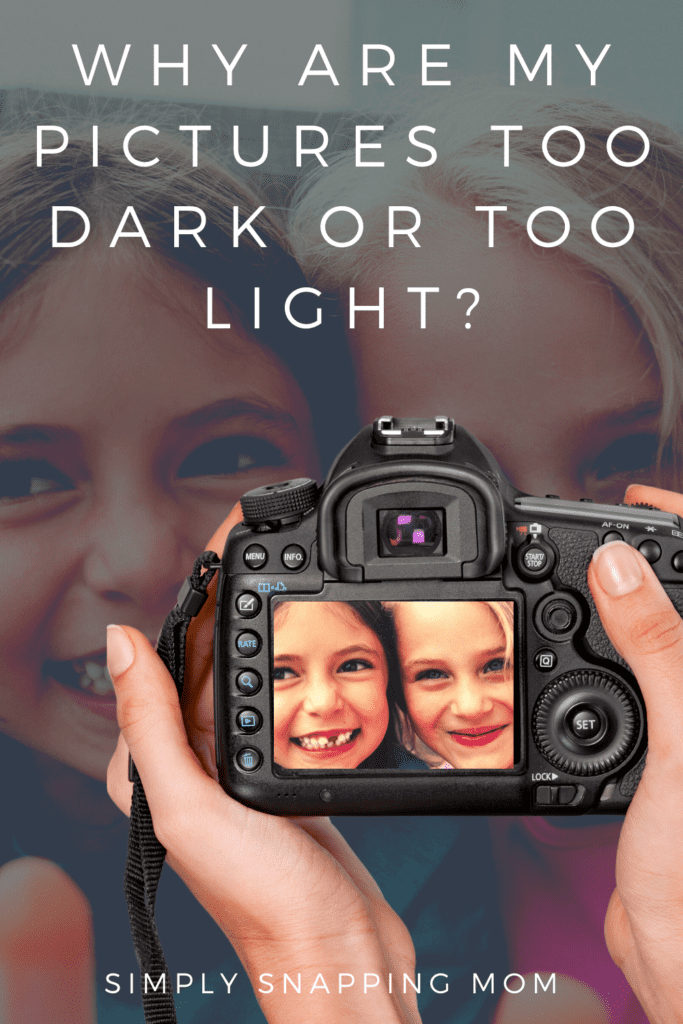
Exposure determines how dark and how light your pictures are. For many beginner photographers this is very hard to grasp.
In reality, there are some simple tricks you can learn to make sure you have the right exposure in your pictures.
Your camera actually has a BUILT-in camera guide to tell you, BEFORE you take your picture, if your image will be too dark or too light.
Click here for my full post on what the meter is and how to use it to improve your photography.
When you read your meter, you can adjust your settings (like aperture and shutter speed), or you can increase or decrease another setting- called ISO.
ISO is explained here:
If your picture is too dark, you can INCREASE your ISO.
If your picture is too bright, you can DECREASE your ISO.
What is the Best Lighting for Photography?

Photography and lighting go hand-in-hand.
When you learn simple photography lighting rules, your pictures will instantly improve- in dramatic ways!
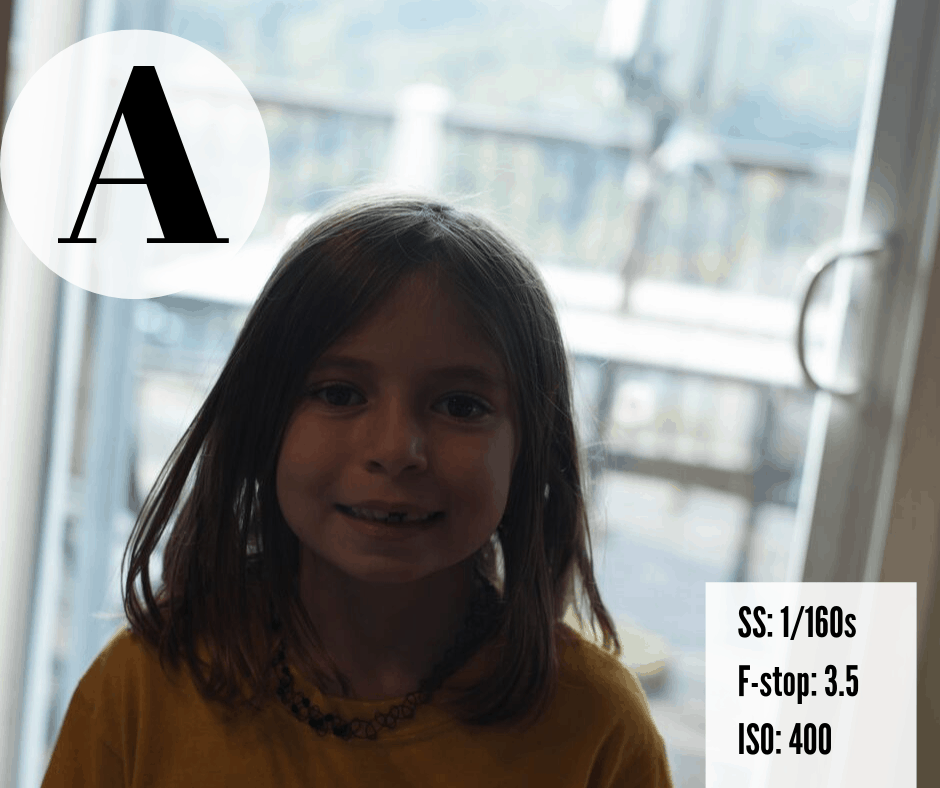
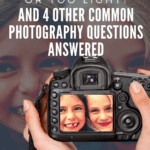
When you are taking pictures indoors, your best option is to get near natural light and have your subject FACE the light.
Picture A and B were taken in the EXACT same spot. However, in picture A the subject had their back to the light and it picture B the subject is facing the light.

Another great light tip, specifically when you are taking outdoor pictures, is to find shade.
Picture A below was taken in direct sunlight, and picture B was taken two feet back in shade.
These are my two favorite lighting tips, but for my 5 best lighting rules, click here.
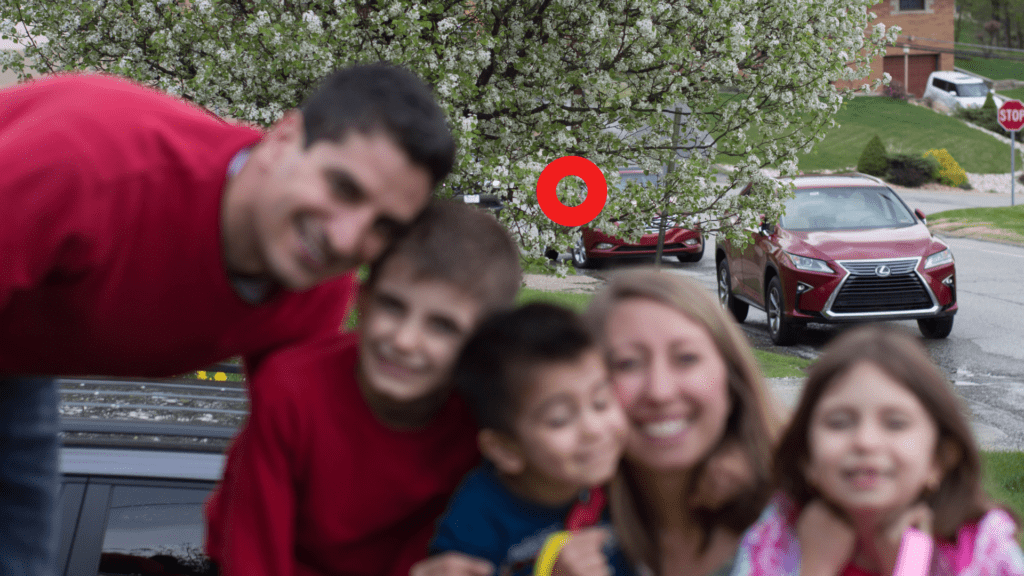
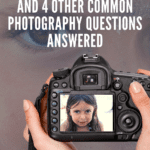
How do I Know Where to Focus?

Where your camera focuses it’s attention, is called the focal point. It is the little red dot you see when you look through the viewfinder.
WHERE your focal point is on your picture controls if your picture looks the way you intended it to, and if it will be pleasing to your viewer.
Here is an example of the impact the focal point can have on your picture.

I recommend selecting the single-point focus mode, so that you have full control over where the red dot is.
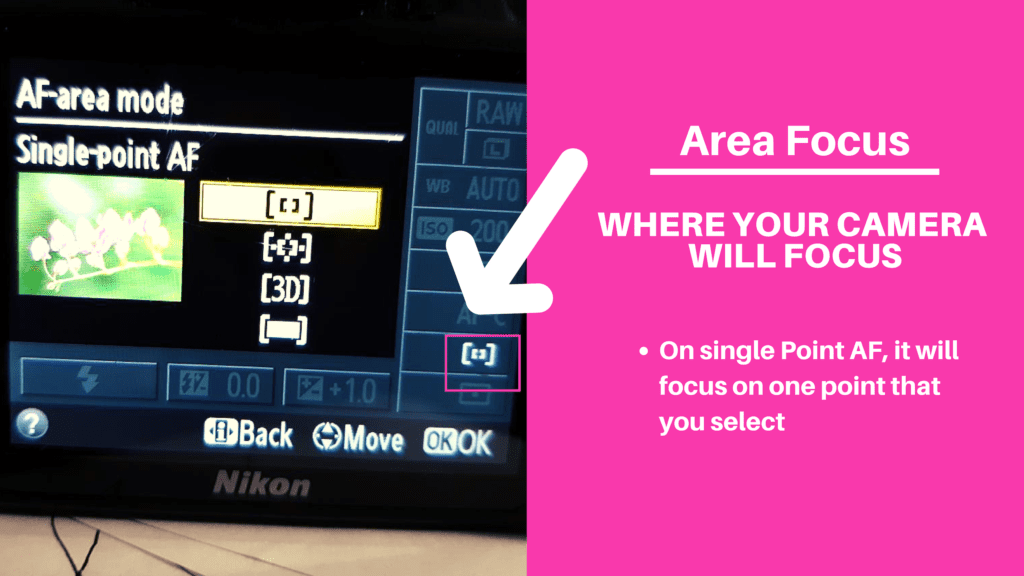
For a complete tutorial on your camera’s focus options and settings, click here.
Final Thoughts
These simple tips will help you dramatically improve your photography.
For more details, subscribe here to instantly download your free 20+ page Ebook on photograpy – Simply Snapping.
If you found this helpful share it!

Cheryl Moore
Friday 9th of July 2021
Great place for beginning photographers!