
Learn all about shutter speed – one of your camera’s most important settings. When you understand the three BASIC settings you will be able to grasp your DSLR camera and take pictures you love. Article includes free printable ebook and video tutorial.
Are your subjects blurs in your photographs? Do you like 1 our of every 30 picture you take? If so, this most likely has to do with your shutter speed settings.
The shutter on your camera controls the exposure time, or the length of time that the camera’s shutter is open.
Think of the shutter as an eyelid. If you blink FAST, then you can’t see things move. If you keep your eyes open for LONG time, then you can see movement.
You camera in automatic mode, can only go off of the settings it has a a tiny robot. In other words, your camera has no idea if your subject is a sedentary rock or a wild 4 year old boy running through the yard.
Basically, the shutter speed on your camera tells you how long the camera opening stays open. If it is open for say 1 second, then it is open for a long time (in the camera world). This will let in a lot of light (allowing for better pictures in low light); but if there is movement it will be captured in the picture (will be blurry).
On the other hand, if it is open for 1/500 seconds, then the shutter is only open for a split second. In this circumstance, it only lets in a little bit of light, but will take a clear/crisp picture.
Looking for a SUPER Beginner level tutorial on photography settings? Start here!

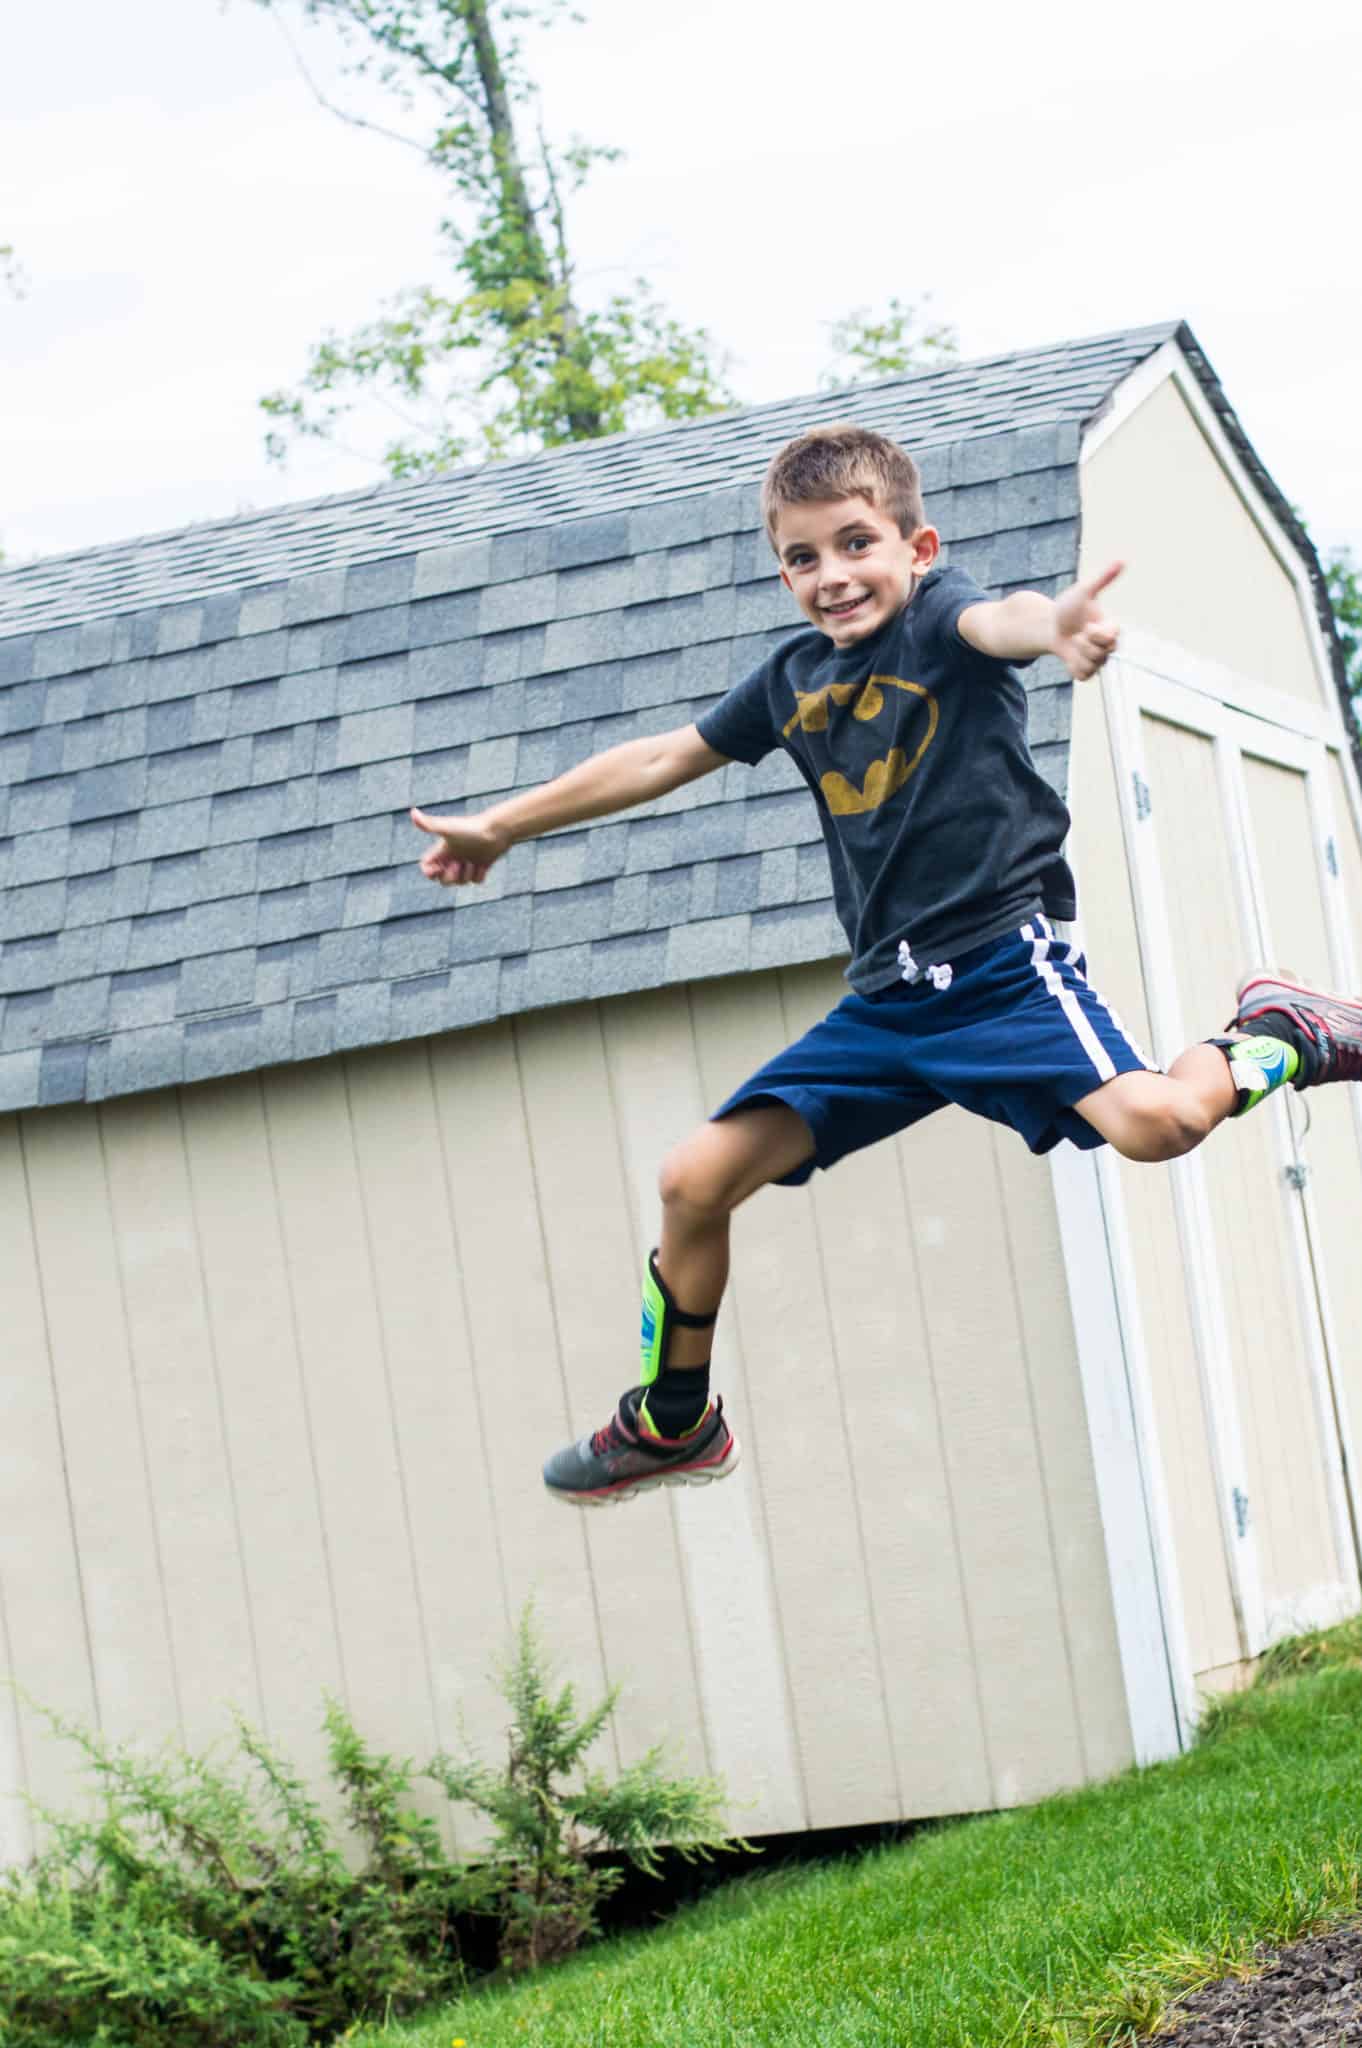
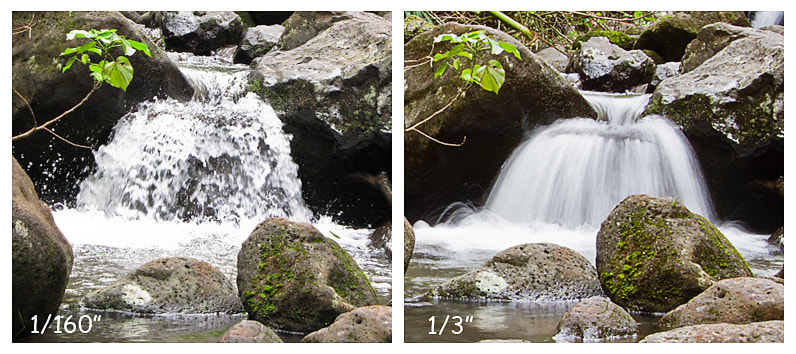
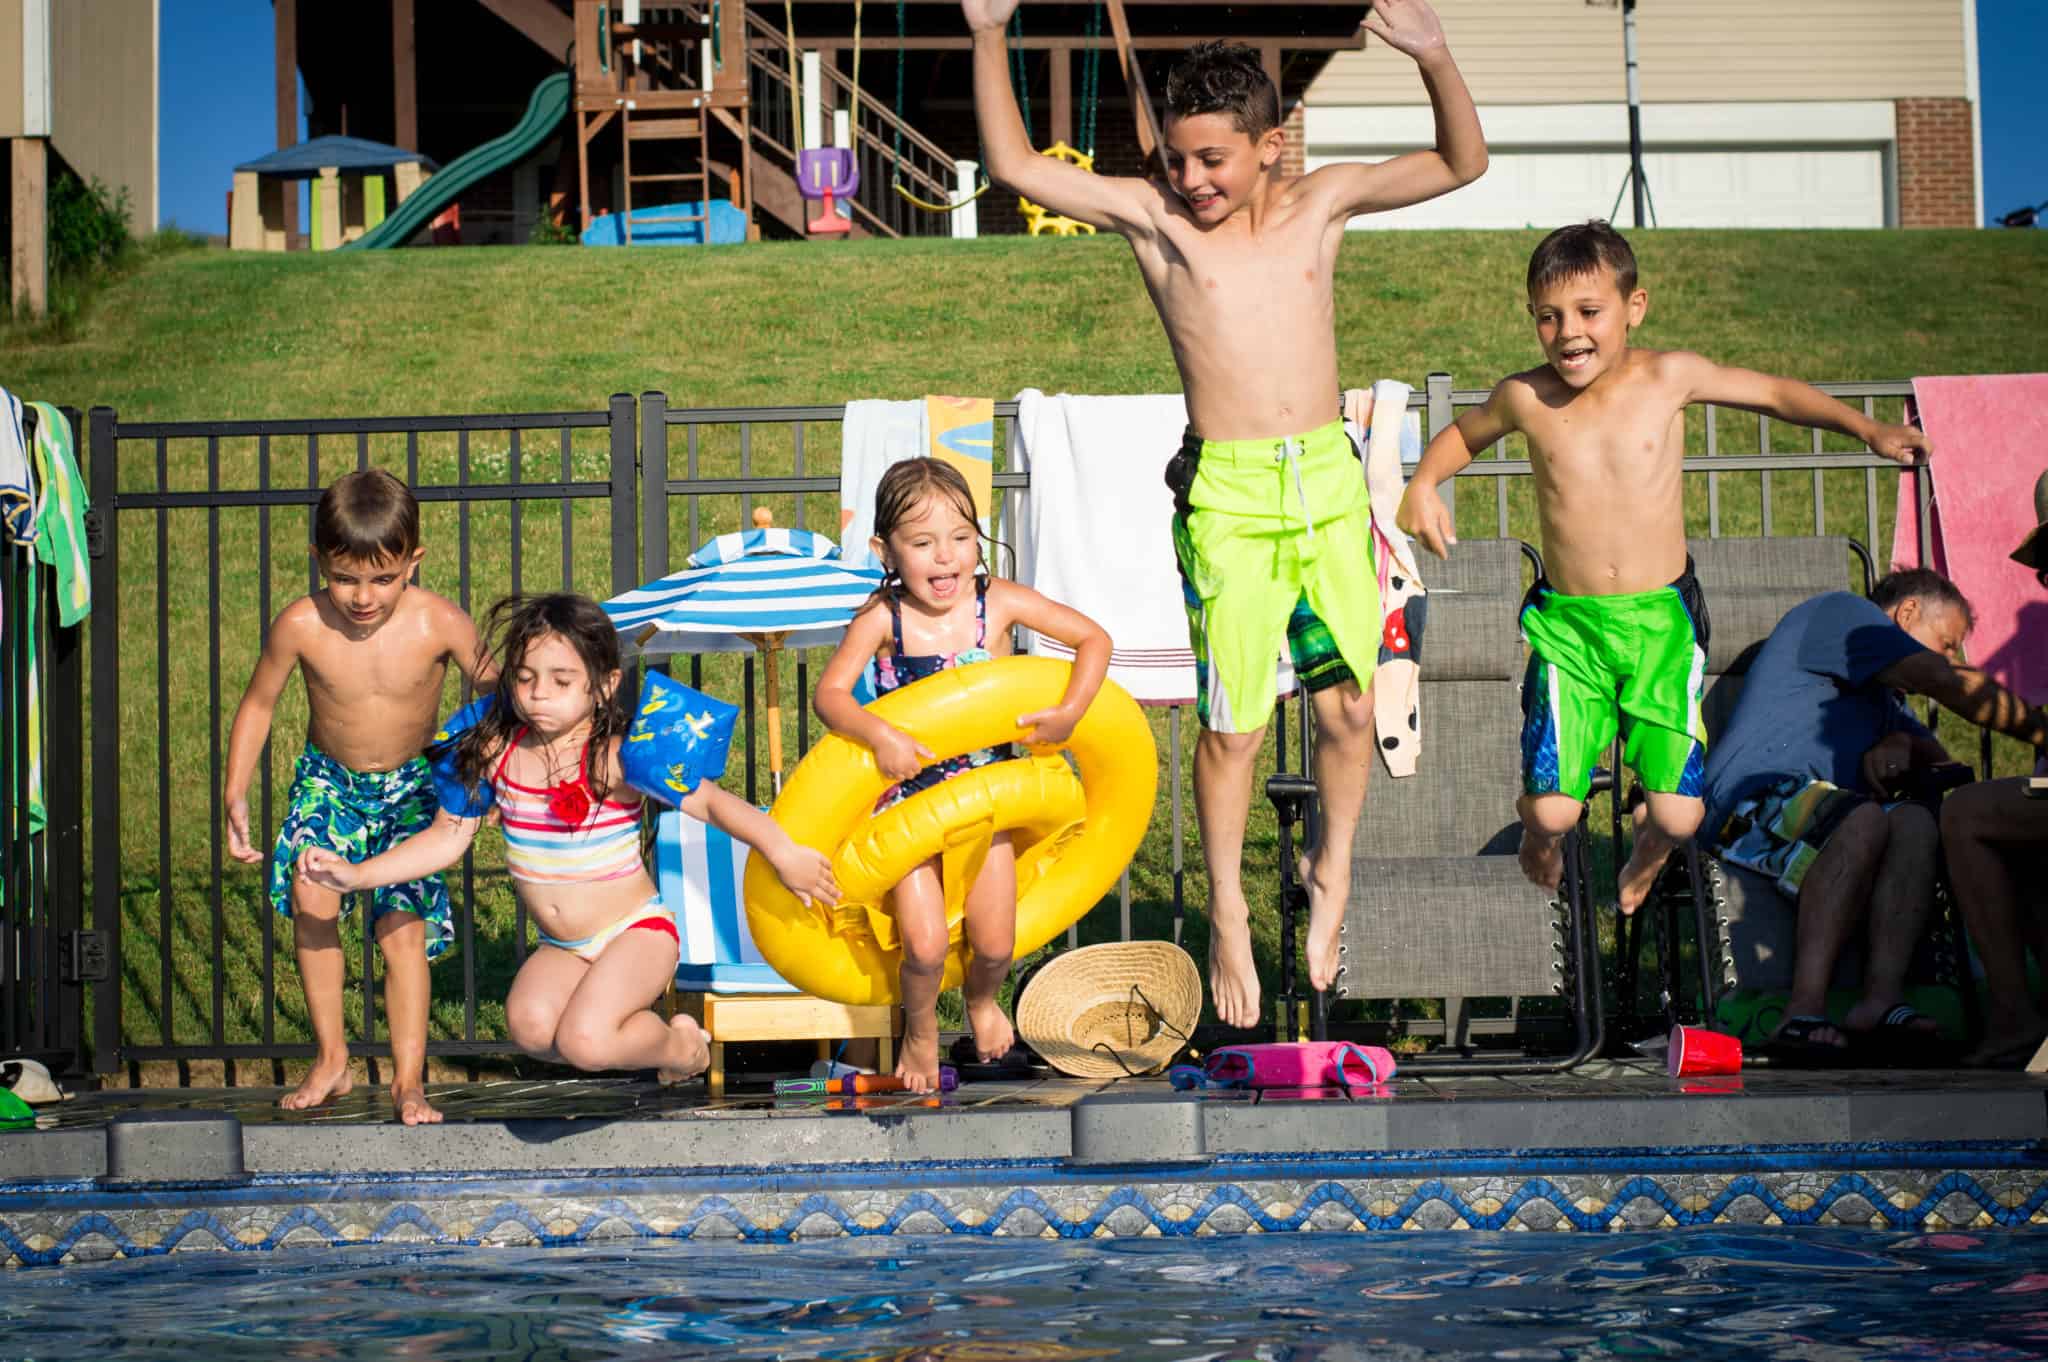
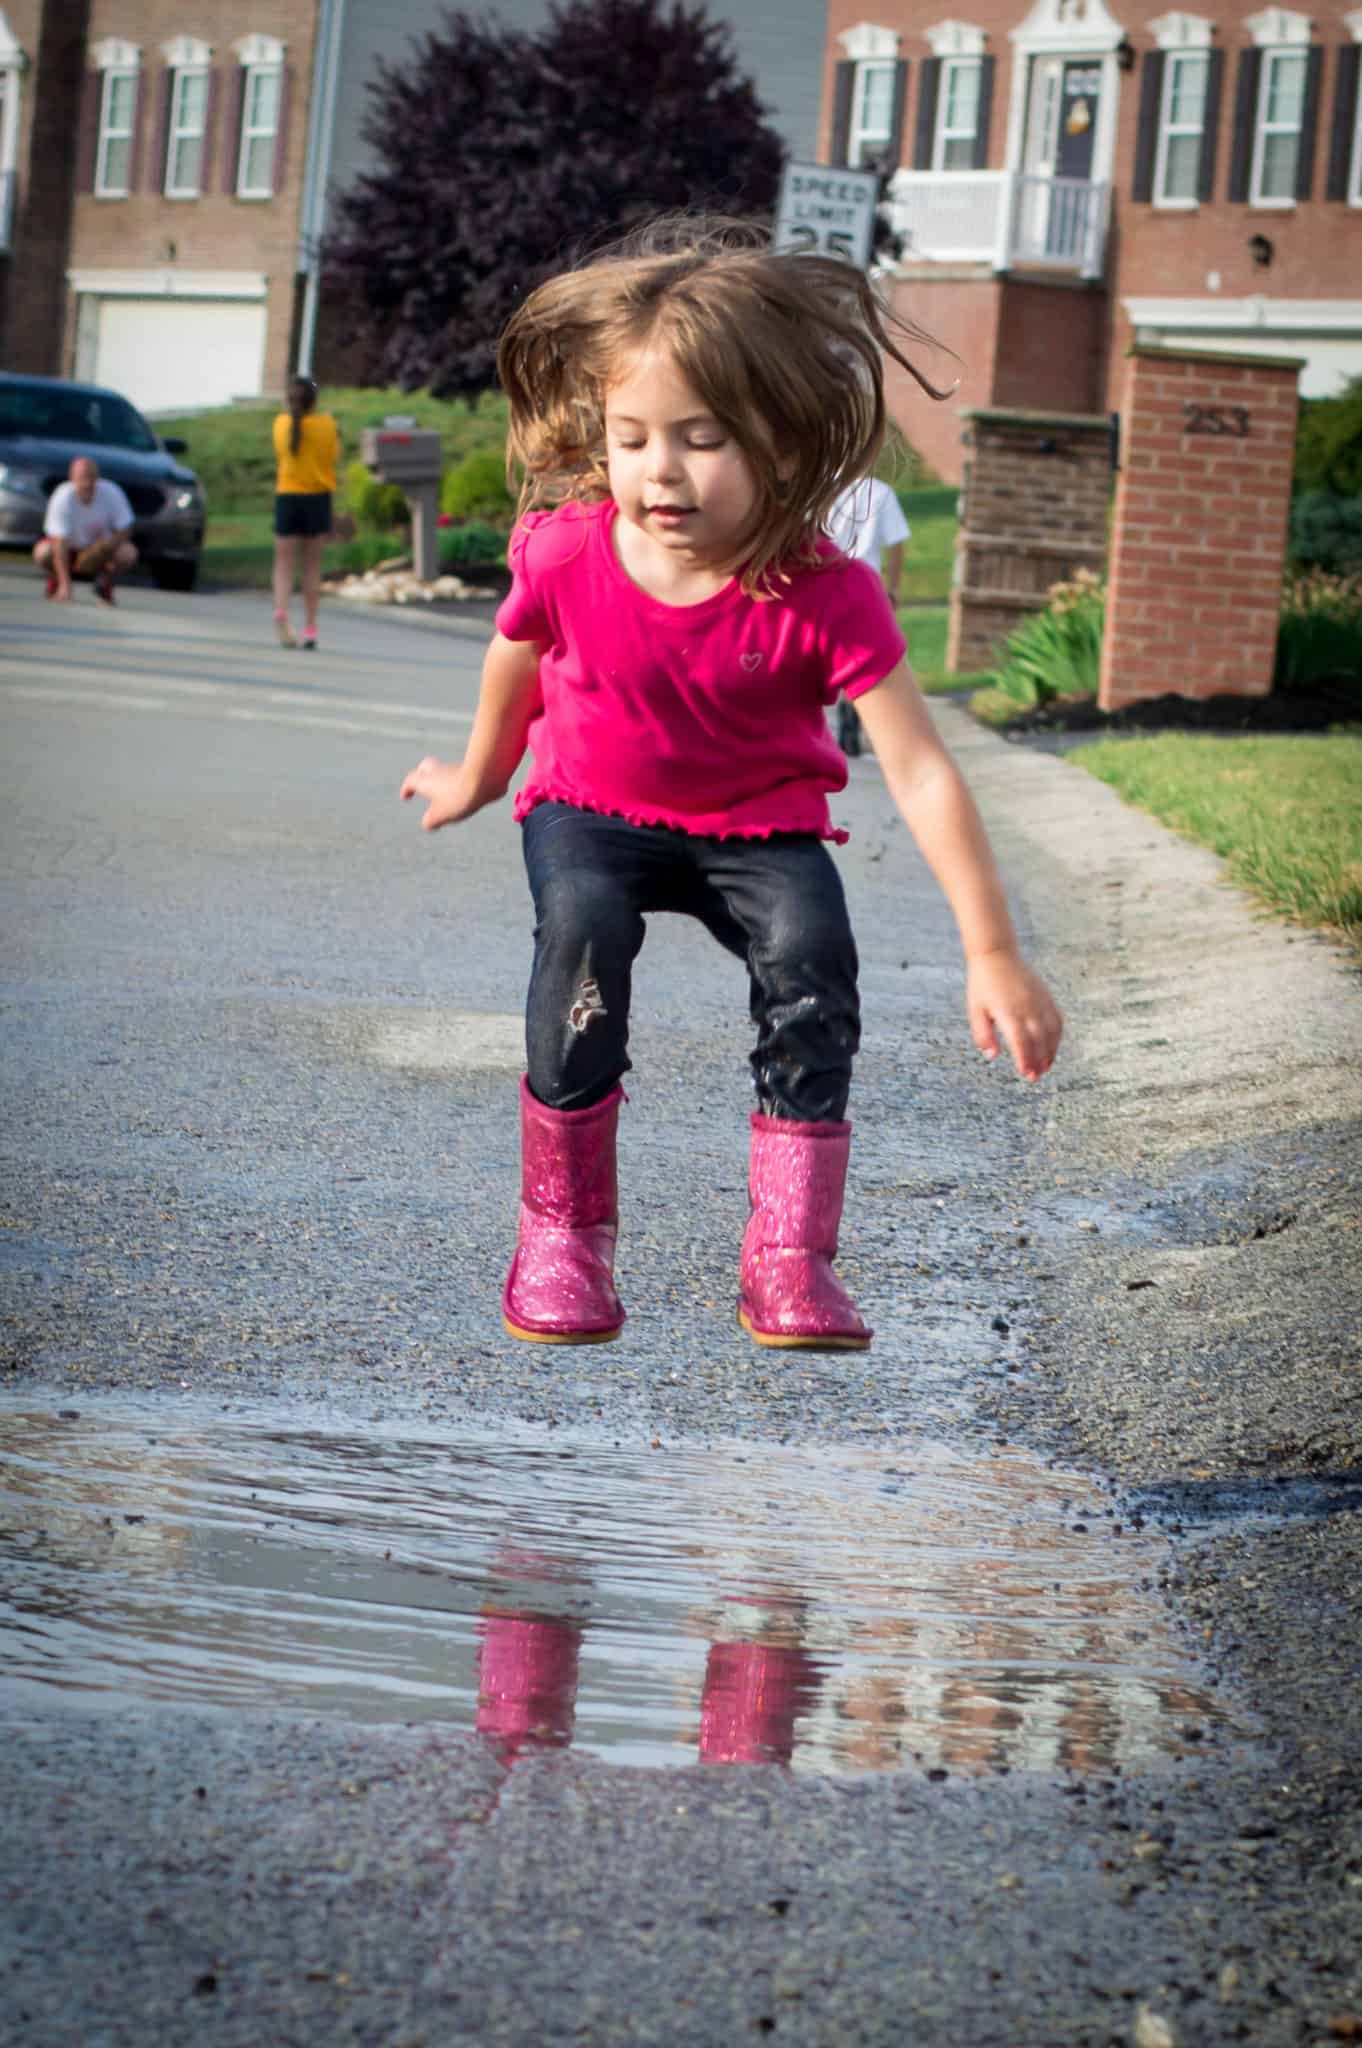
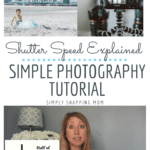
Here is an example of capturing a picture of my son jumping off a swing. The image on the left was taken at a speed of 1/50s compared to the right which is 1/500s.
I typically use a setting of AT LEAST 1/250s anytime I am photographing children.
Download and instantly print this FREE 20-page book: Simply Snapping, Photography for Beginners.
Click here to download!

How Shutter Speed Impacts Light
You are probably thinking “Why don’t you ALWAYS use a fast shutter speed?”
Photography is a delicate balance. As I mentioned above, a fast shutter speed means the shutter is only open for a small amount of time. This only allows for a small amount of light to get in. Therefore, images are darker if you use a fast shutter speed.
You have to make sure you balance out the light around you while you are playing with shutter speed. Or, in other words you have to understand the aperture and ISO settings on your camera (module 2 and 3).
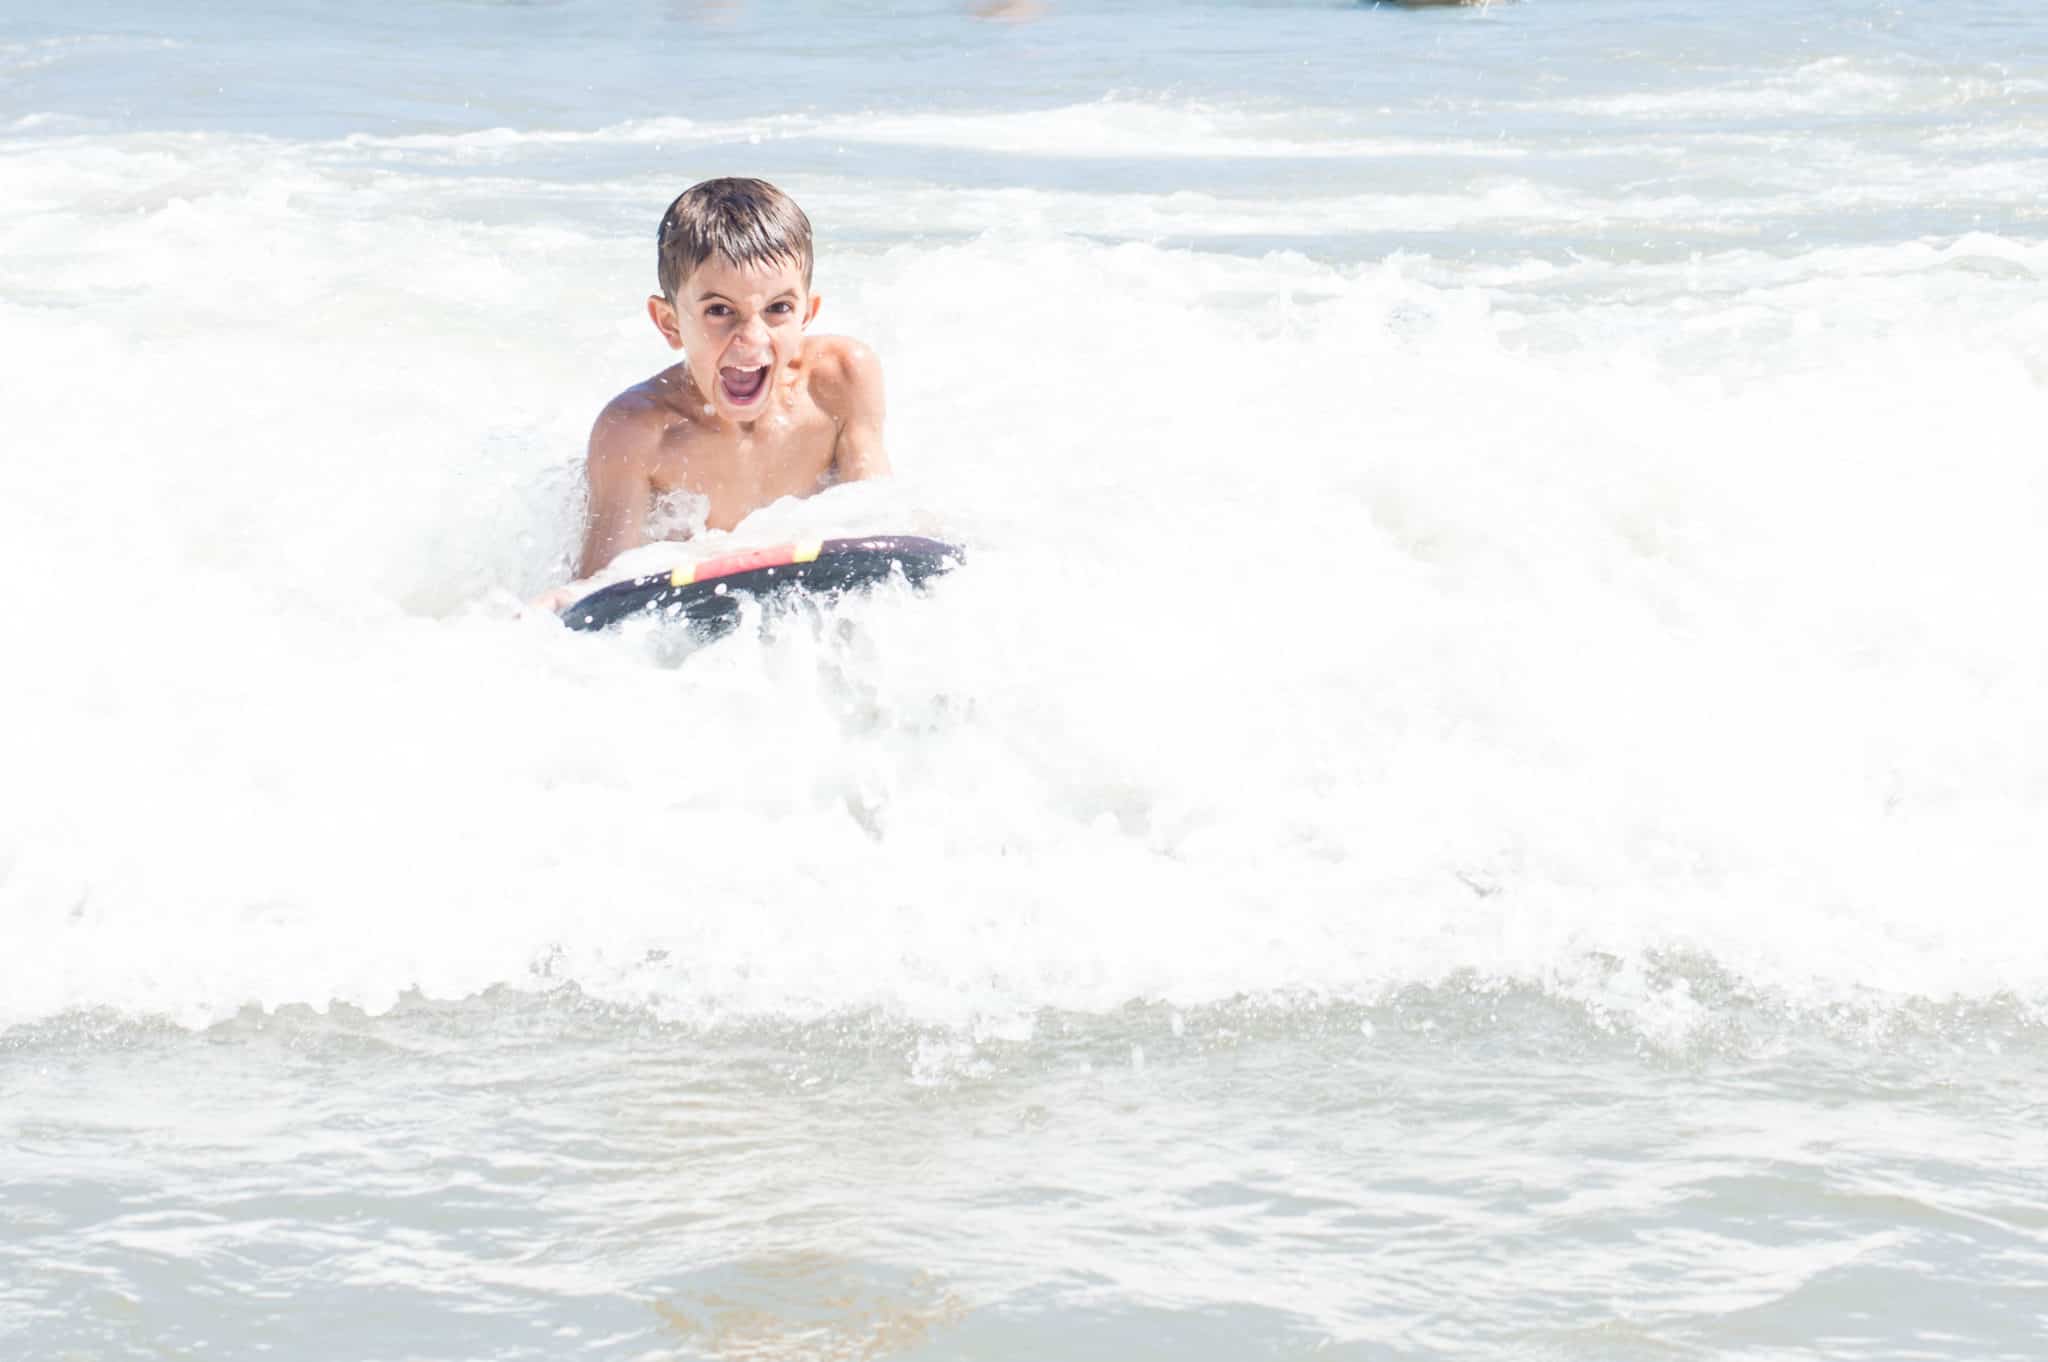
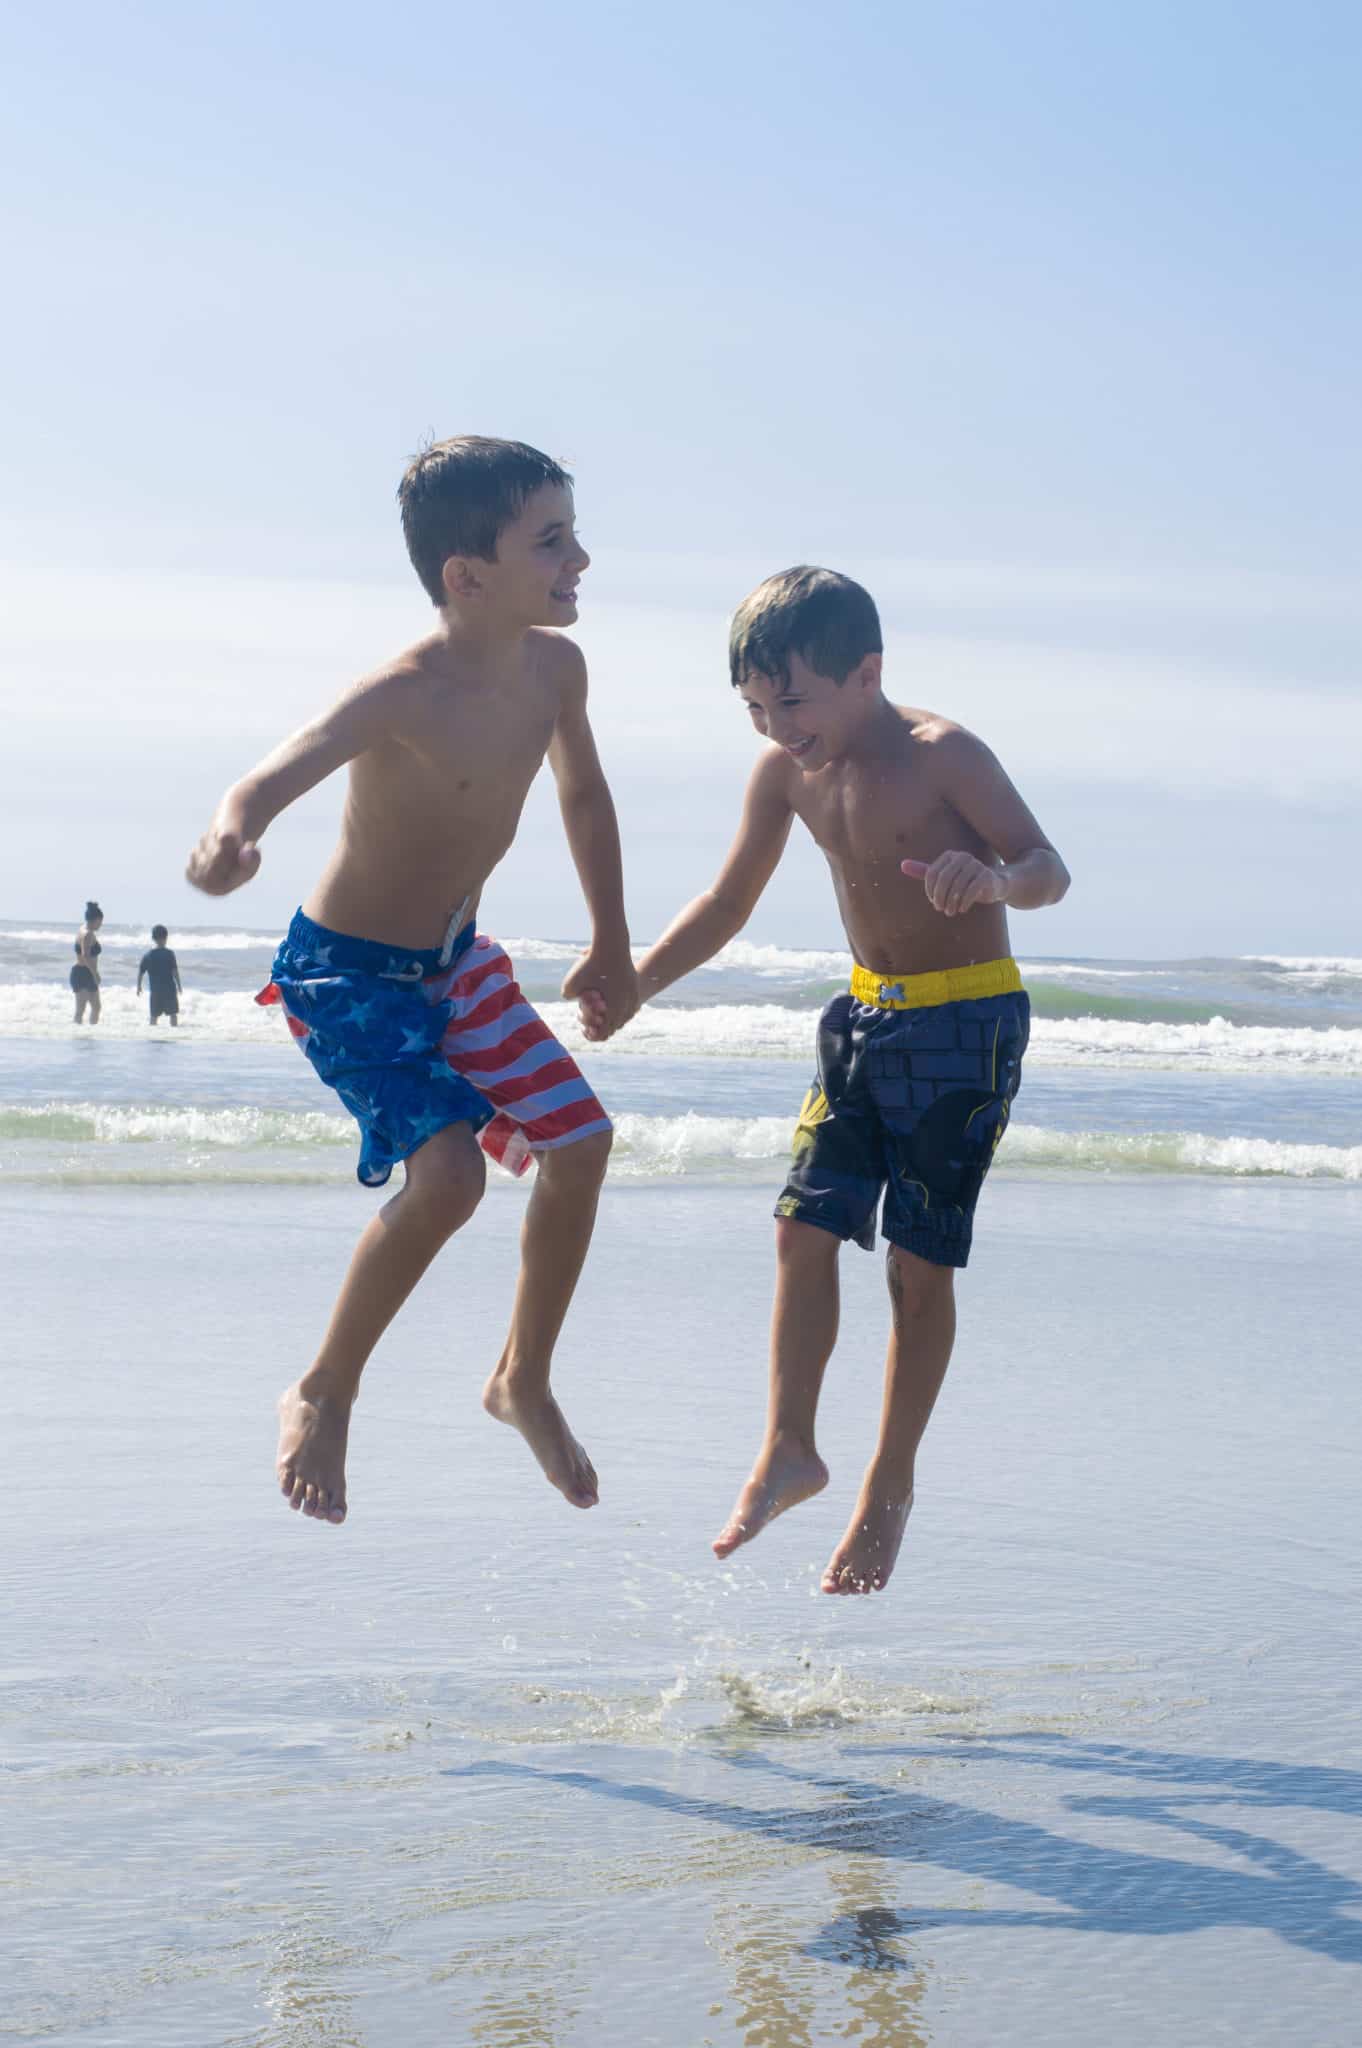
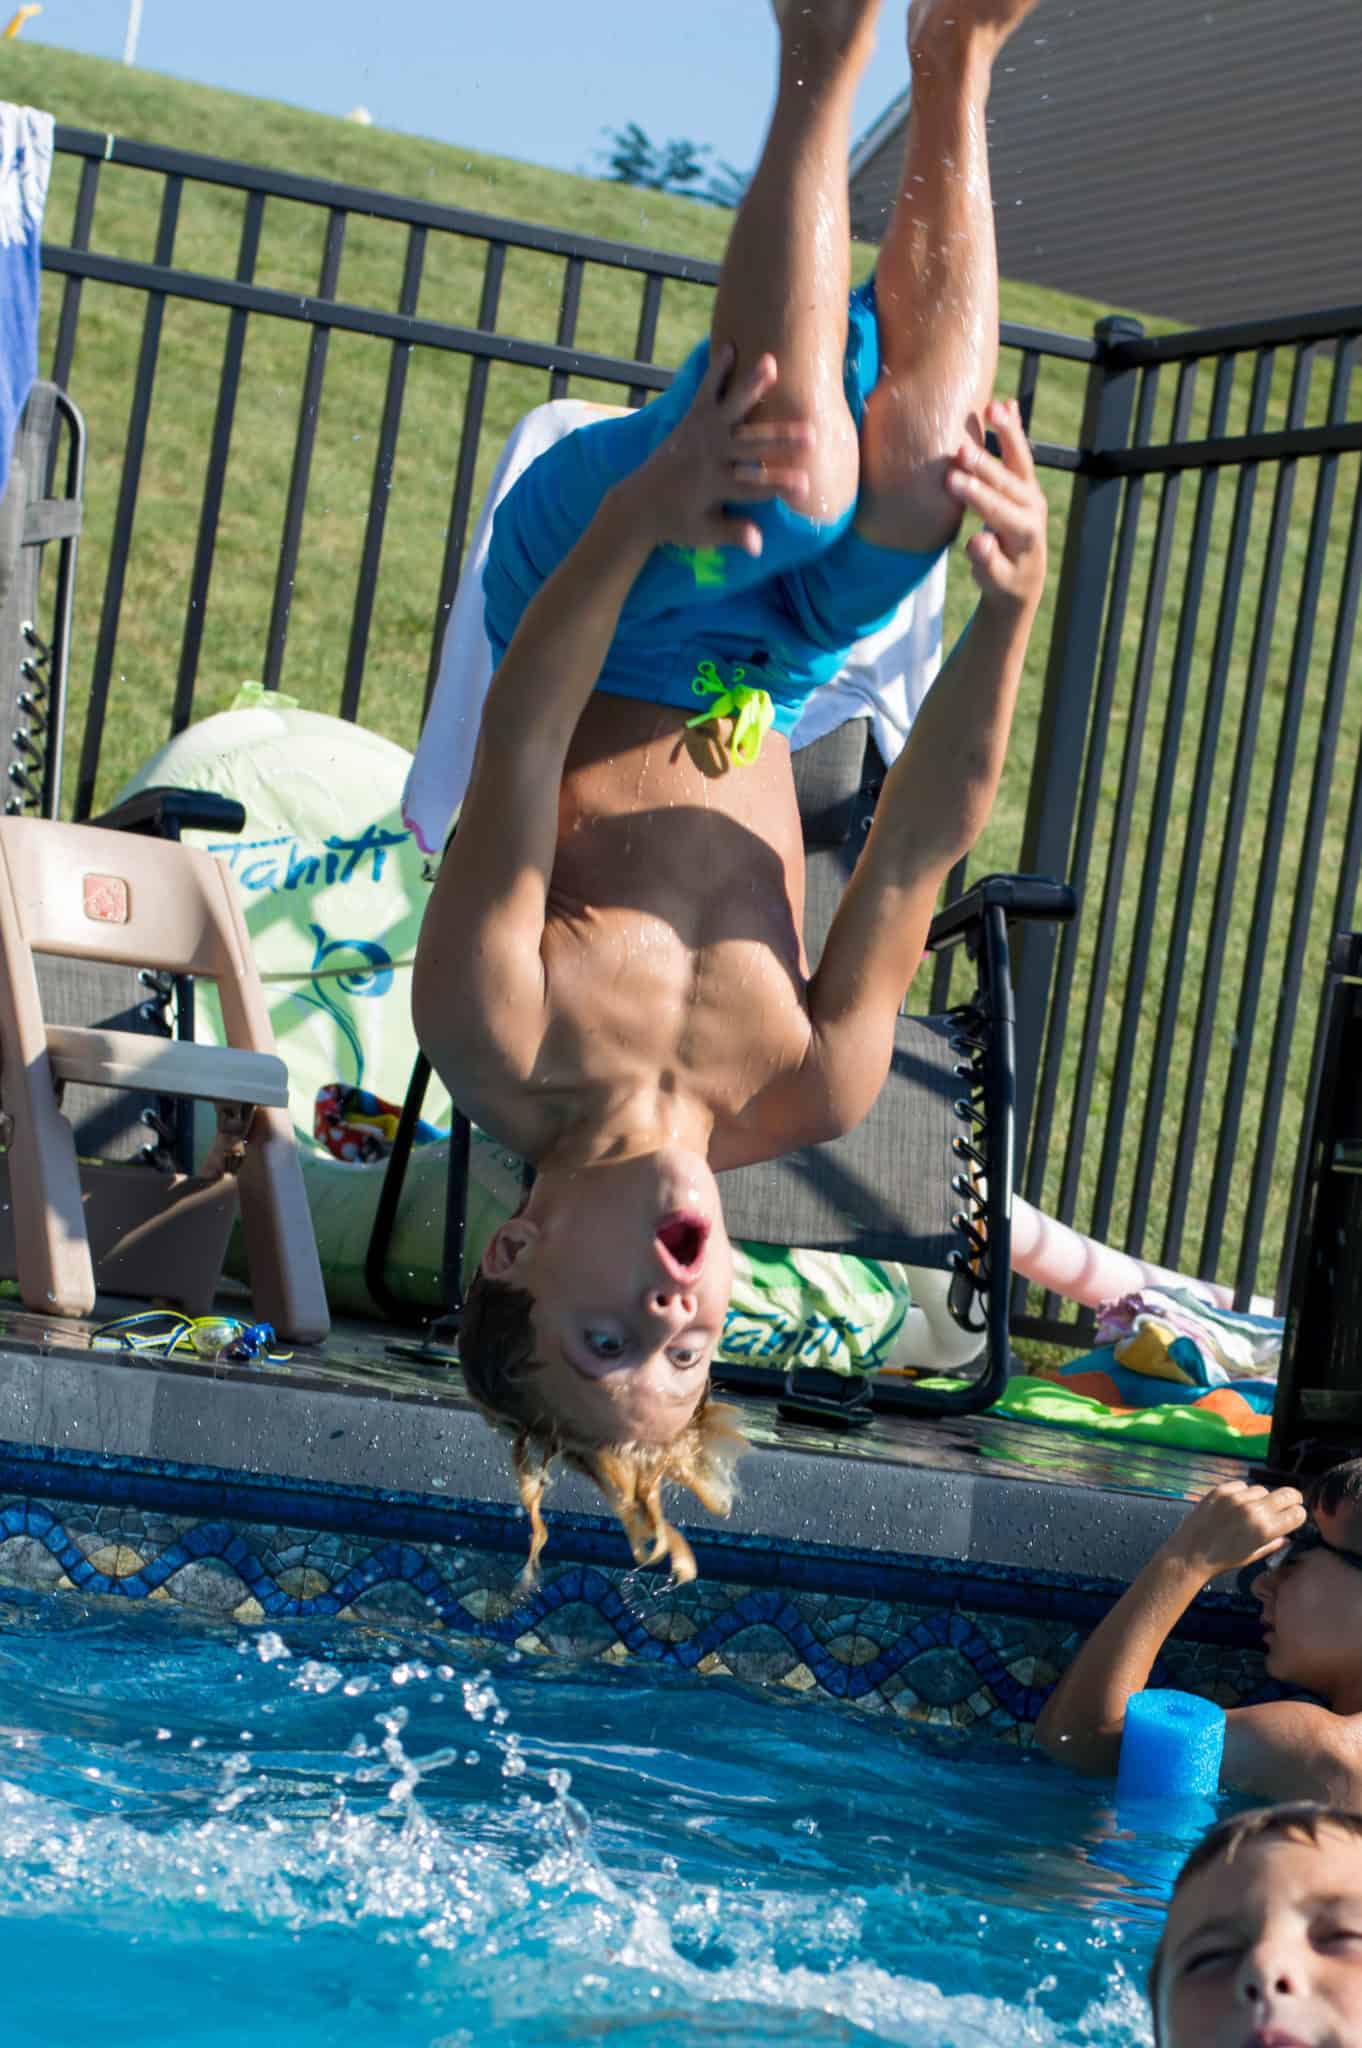
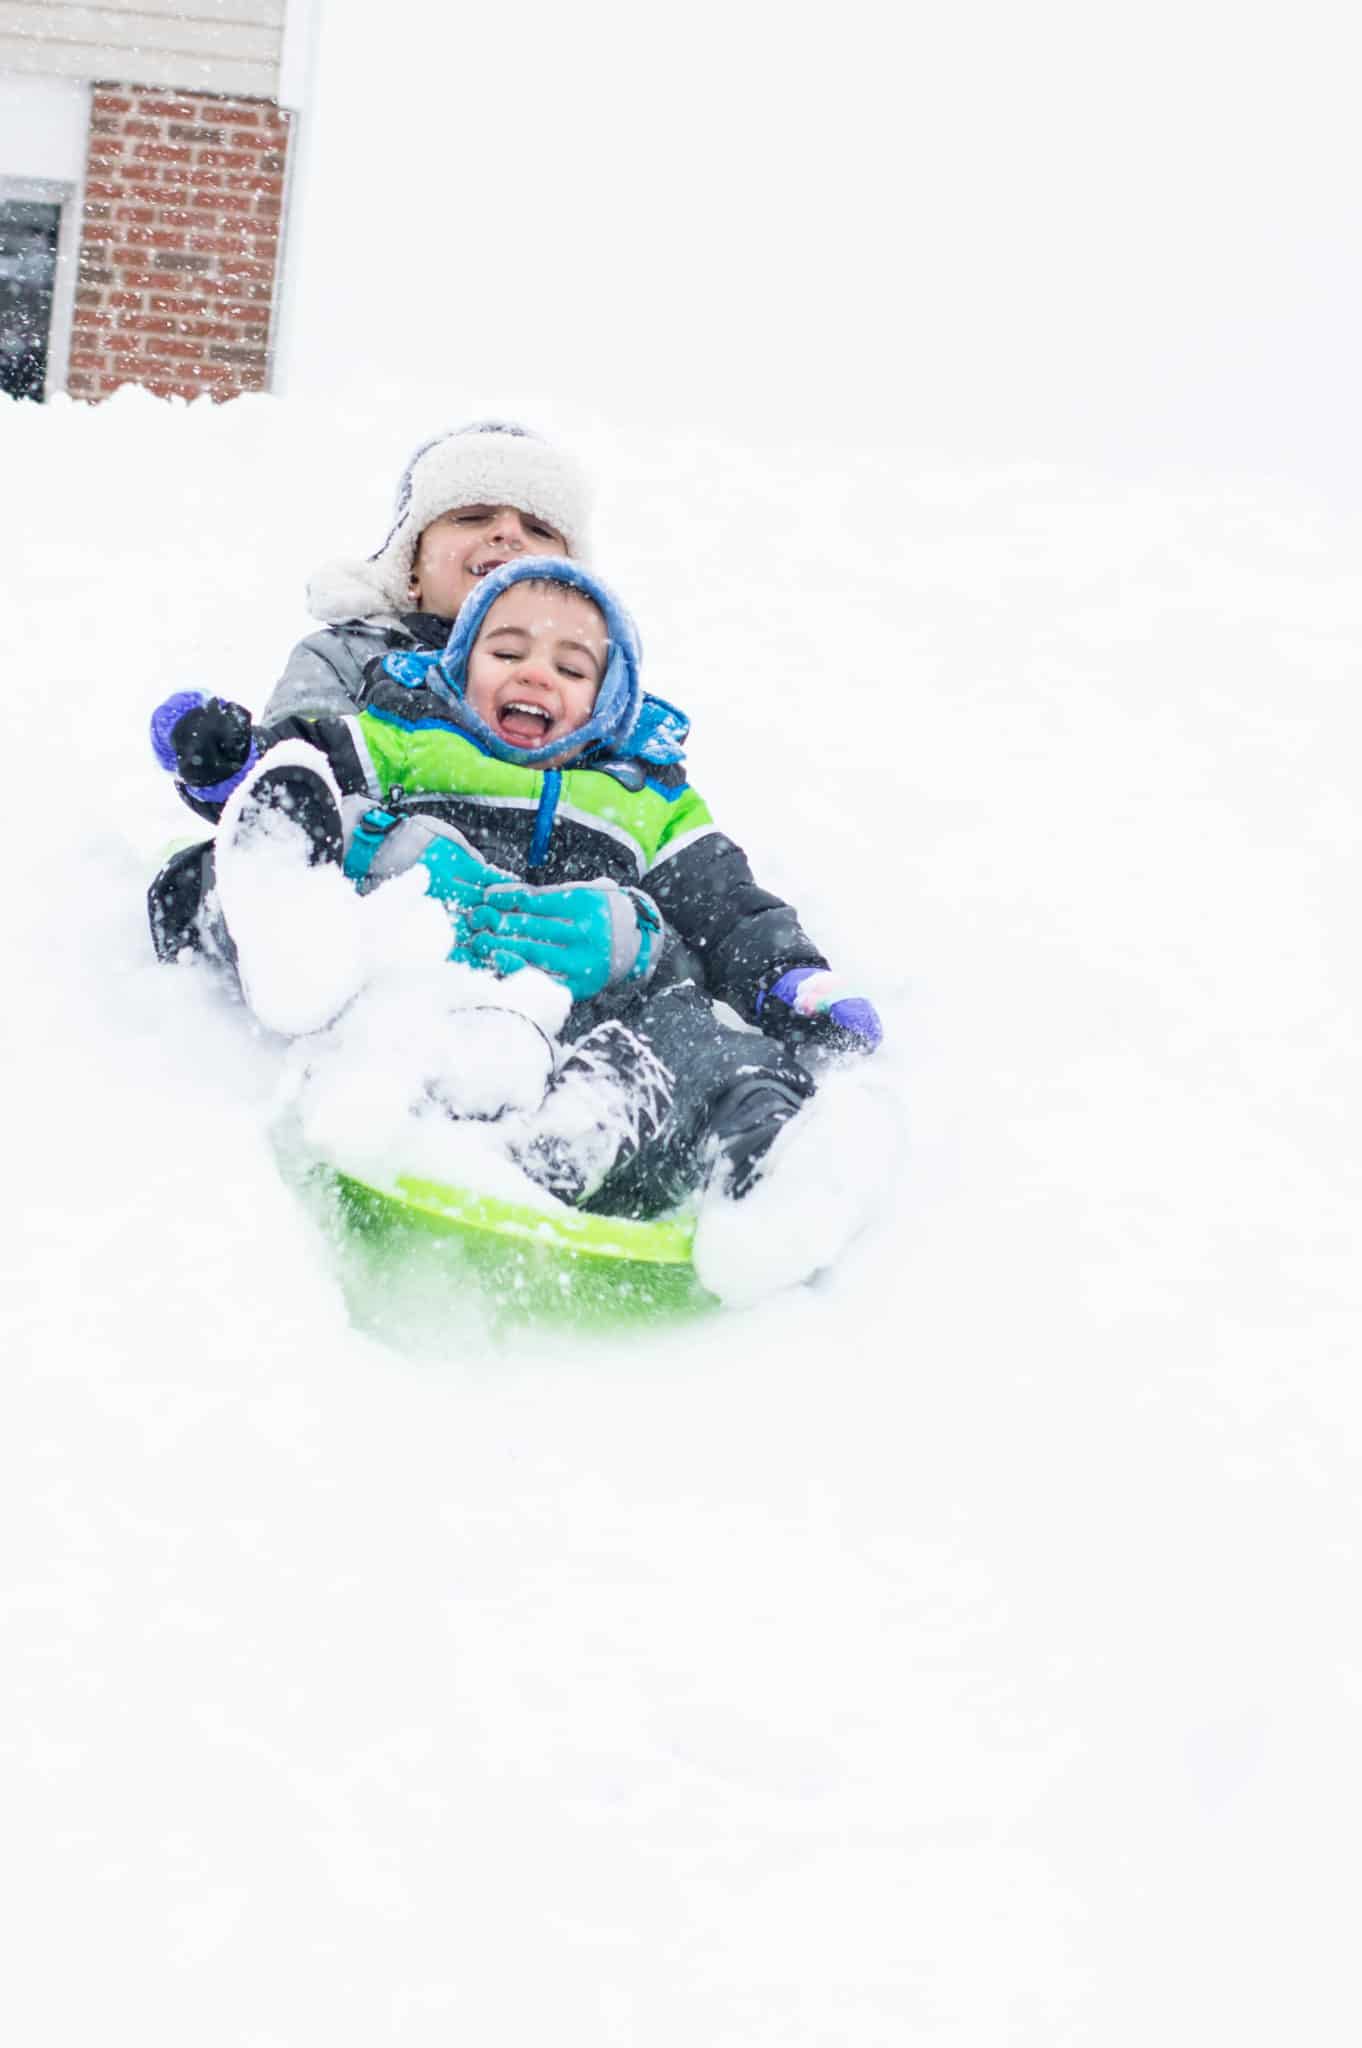
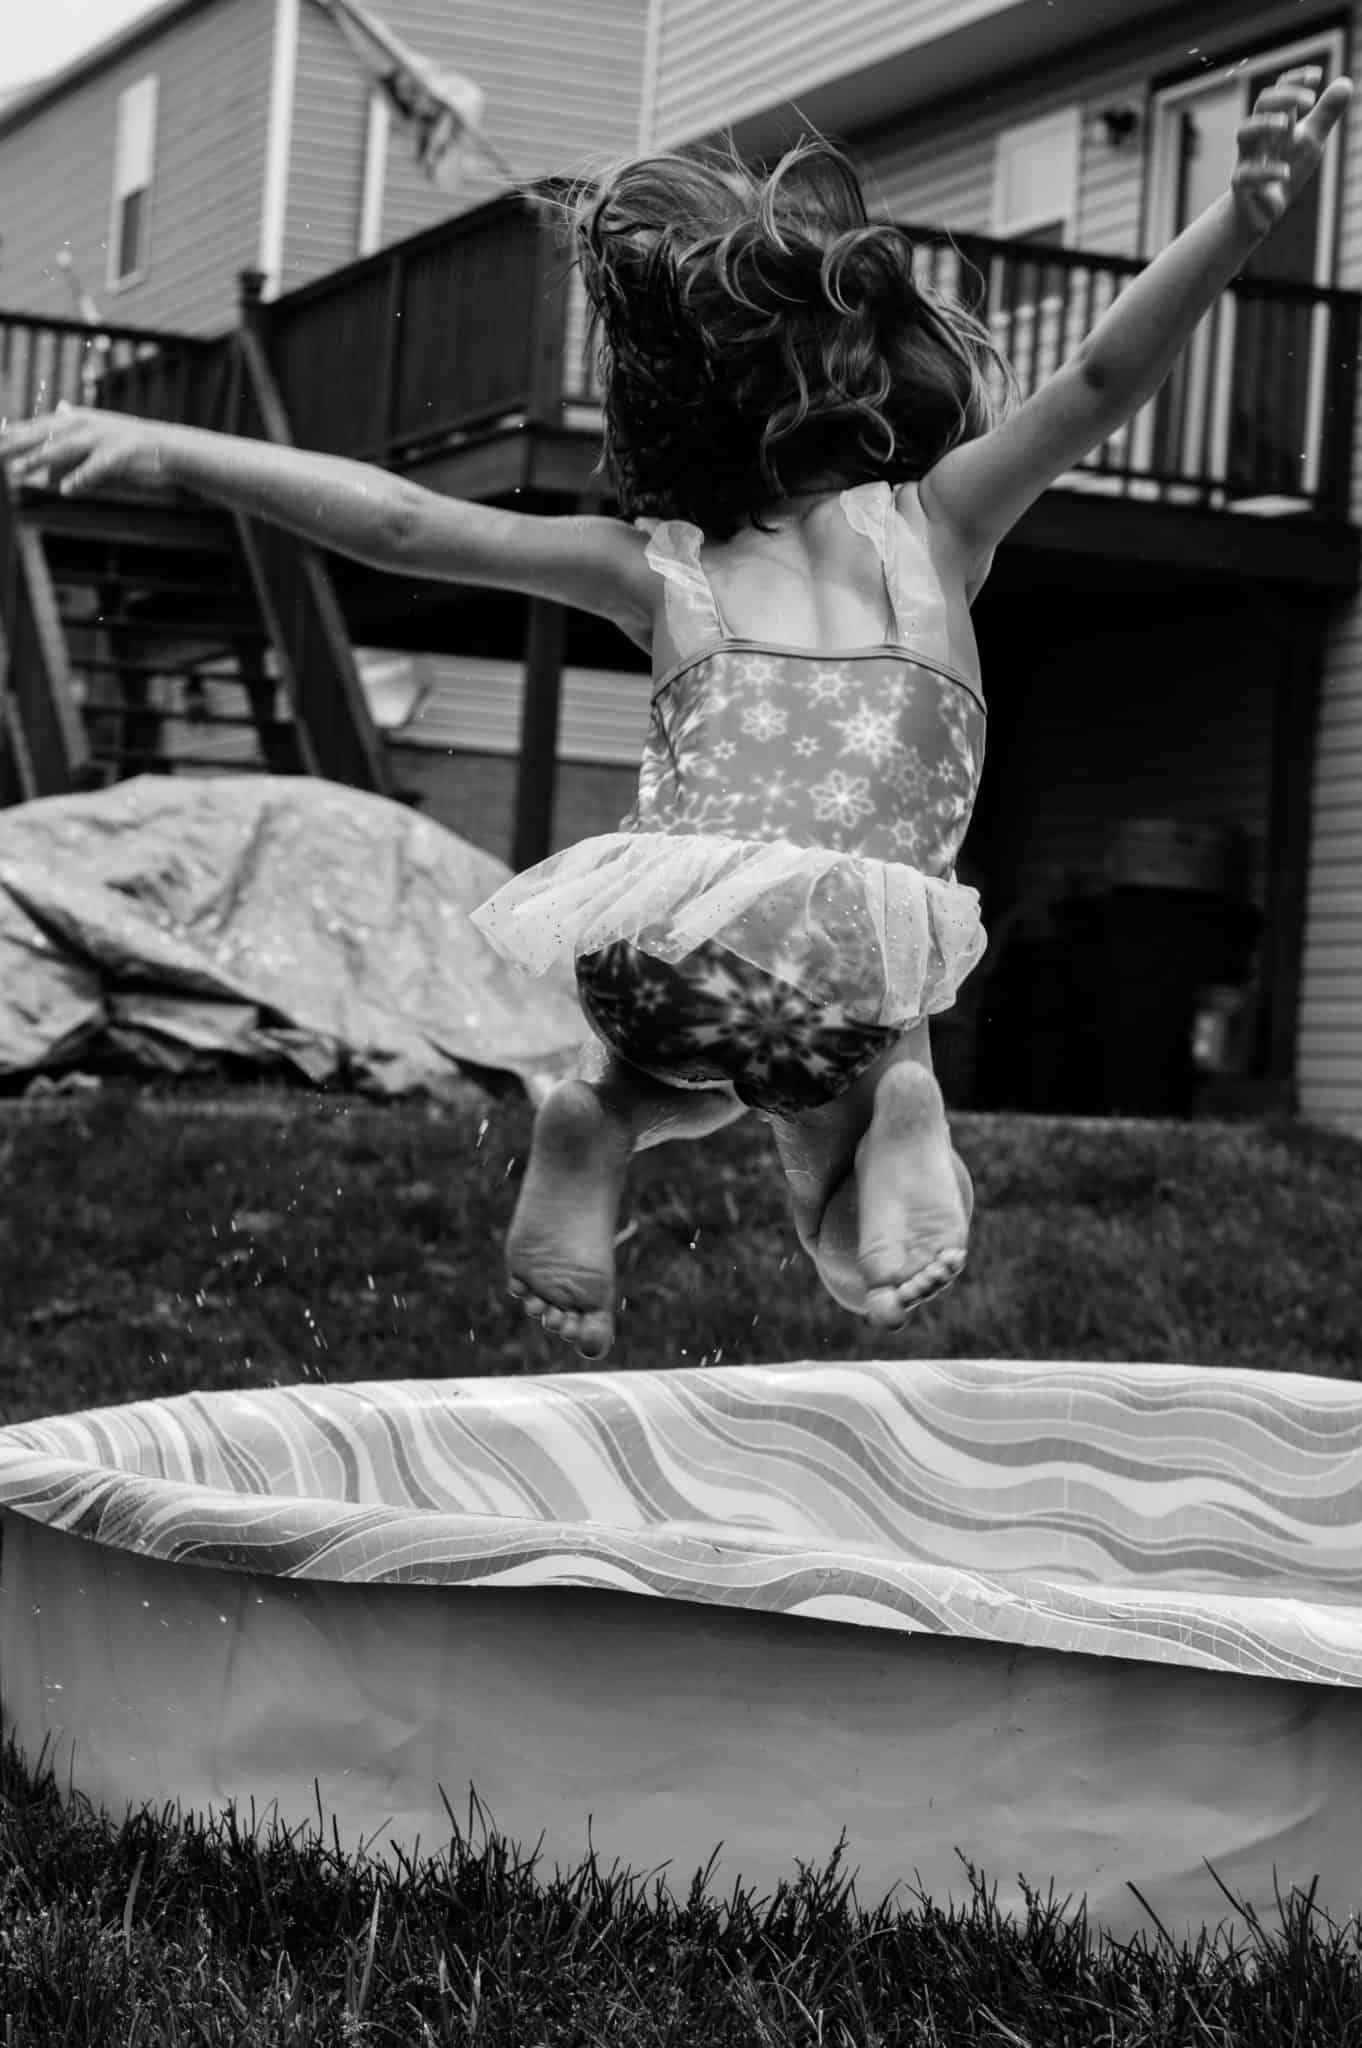
Here are some example where I used a fast shutter speed to a clear image of a moving subject:
Sometimes a slower shutter speed can be useful. If you are taking a picture in low light, a slower shutter speed will let in more light and allow for a brighter image. Also, sometimes a slow shutter speed can be used to your advantage- such as when you are taking pictures of running water.
Also, if you are more of a visual learner, check out my video tutorial on shutter speed below or my complete three part video tutorial post!
Mastering the Shutter
Now that you understand shutter speed. You need to practice to really get the hang of the different options. There are two good ways to do this.
- Read more, and jump into manual mode
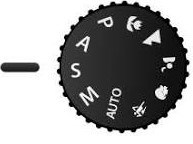
- Try “shutter priority” mode. With this mode, YOU adjust the shutter speed and the camera automatically adjusts other settings to optimize exposure.
To try Shutter Priority Mode set your camera to this setting. Note: based on your camera brand and edition it may look different. Consult with your manual.
Assignment: Take pictures of moving objects: water running, kids jumping, cars, animals– whatever you want! You will quickly get the hang of shutter speed if you start to experiment!
You can practice first on something you can easily control- such as water running out of a faucet. See how the image changes when you shoot it as 1/23s vs. 1/500s.
Next Steps for the Beginner Photographer
Check out these other modules to learn more about your camera!
- Understanding Aperture: The Camera Setting that controls background blur
- Understanding ISO: Your camera’s ‘sunglasses’
- Tie it all together with your camera’s meter
After reading through all of the modules you will understand how all of the settings are intertwined!
If you found this helpful, share it!
ISO Explained for the Beginner Photographer: The Secret to Manual Mode - Simply Rooted Family
Wednesday 16th of March 2022
[…] blur, and emotions in your photo. If you haven’t done so, first understand aperture and shutter speed, by checking out these posts – OR this tutorial if you are brand new to […]
Crazy-Simple Photography Beginner's Guide to Camera Settings Basics - Simply Rooted Family
Wednesday 2nd of February 2022
[…] speed is your camera setting that determines how fast the shutter, or the ‘camera’s […]
Simplifying Photography: ISO and Manual Mode Edition -
Monday 14th of October 2019
[…] blur, and emotions in your photo. If you haven’t done so, first understand aperture and shutter speed, by checking out these […]
Andrés Enrique Escoto Castro
Wednesday 7th of August 2019
Great recommendations for taking pictures on motion =D
How to do a Glitter Photo Shoot - Simply Snapping Mom
Saturday 12th of January 2019
[…] First, you need a FAST shutter speed. This will allow you to capture the glitter particles and not movement blur. I used a shutter speed of 1/800s in my photo shoot. If you need assistance with shutter speed, check out my post explaining it! […]