My favorite part of photography is the ability to highlight even the tiniest details in bold ways. I think that is what intrigued me so much about doing a side-by-side portrait.

Follow these four quick tips on lighting, positioning, camera settings, and editing to achieve this look. Make sure you print the free guide at the bottom for a quick resource!
1)Lighting
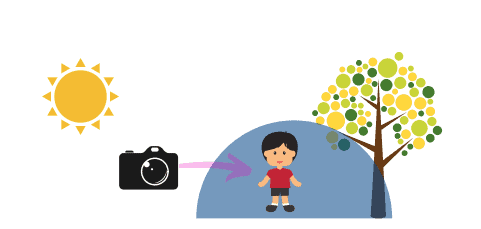
For this portrait, you want to get a sharp picture with soft lighting. Avoid taking this portrait in direct sun. You don’t want your subjects to be squinting or washed out by harsh lights. I recommend the following two lighting scenarios:
- Indoors, facing a window (to get catch lights)
- Outside, in open shade
To get open shade, have your subject stand fully in the shade – facing the sun like in the depiction below.
For more easy to follow tips on indoor photography or outdoor photography check out these posts.
2) Positioning
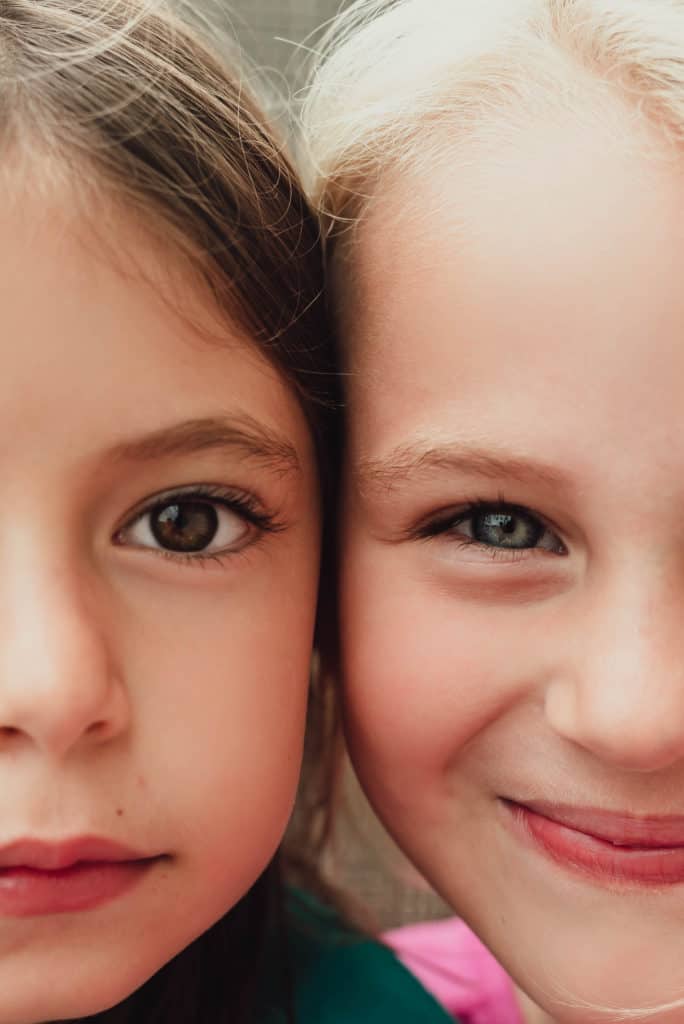
For me, positioning my two subjects was the most difficult part. My son even told me that it was the “worst day of his life” having to get that close to his sister. I giggled, but told him to quiet down and cuddle up with her nonetheless.
Your goal is to get both subjects lined up as evenly as possible, and both looking forward. They will want to turn their faces towards each other, but it is important that they both keep their heads facing forward.
Also, to make sure that one subject is not out of focus, you want them on the same plane. In other words, you do not want one subject closer to the camera than the other.
Here are three methods to get the correct position:
- Touch Ears– Have the subjects sit next to each other and ask them line up their ears.
- Arm around each other– If you are still having a difficult time lining them up, have the taller subject put their arm around the shorter one. This will help with positioning.
- Lay Down– If this doesn’t work, have the subjects lay down next to each other, stand over them, and snap the picture looking down.
3) Camera Settings
In any portrait, it is important to focus on the eyes. The eyes are the most detailed element of the face, and if they are out of focus, then it could ruin a picture.
In this portrait, you are faced with focusing on two DIFFERENT eyes, which poses a challenge. To make sure that both eyes are in focus, you must pay attention to the F STOP or aperture setting.
For more details on what aperture is, check out this post here.
You do not want your F STOP too low. If it is too low (<2.5) then there is a good chance that one of the subject’s eyes will be out of focus. I would suggest working in either manual mode or aperture priority mode to ensure you have control over the depth of field.
I set my F STOP to 4 and take a step back. (I edit crop it afterwards- see below)
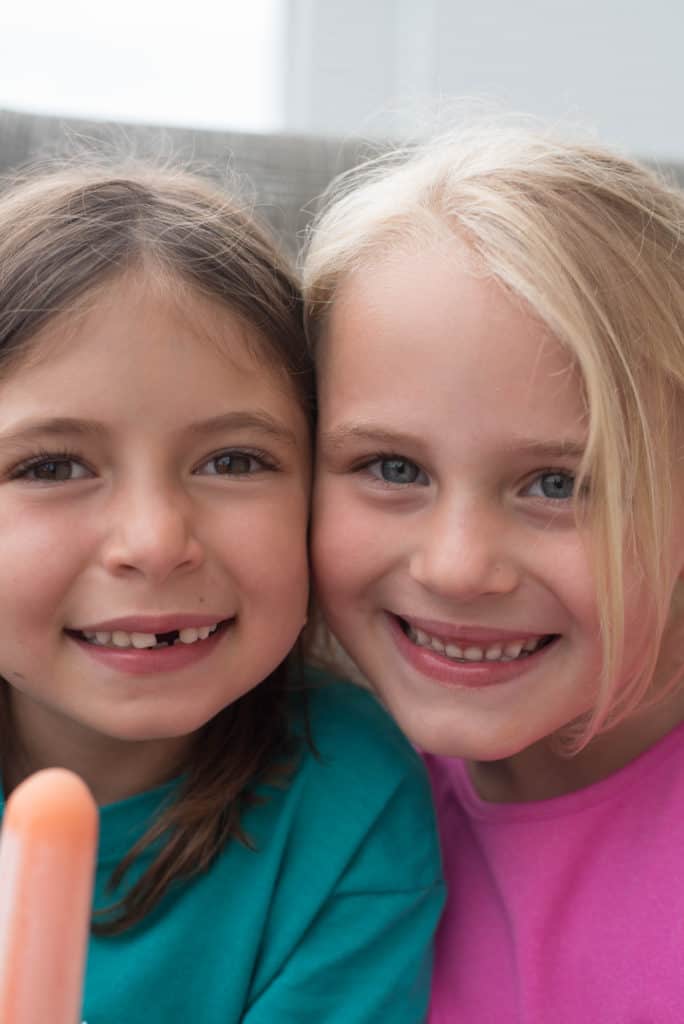
4) Editing
Proper editing will really make this photo pop.
First, when I take a side-by-side portrait, I take a few steps back and then crop it closer. This gives me flexibility with the picture and helps avoid out of focus areas.
Straight Out of Camera (SOOC) 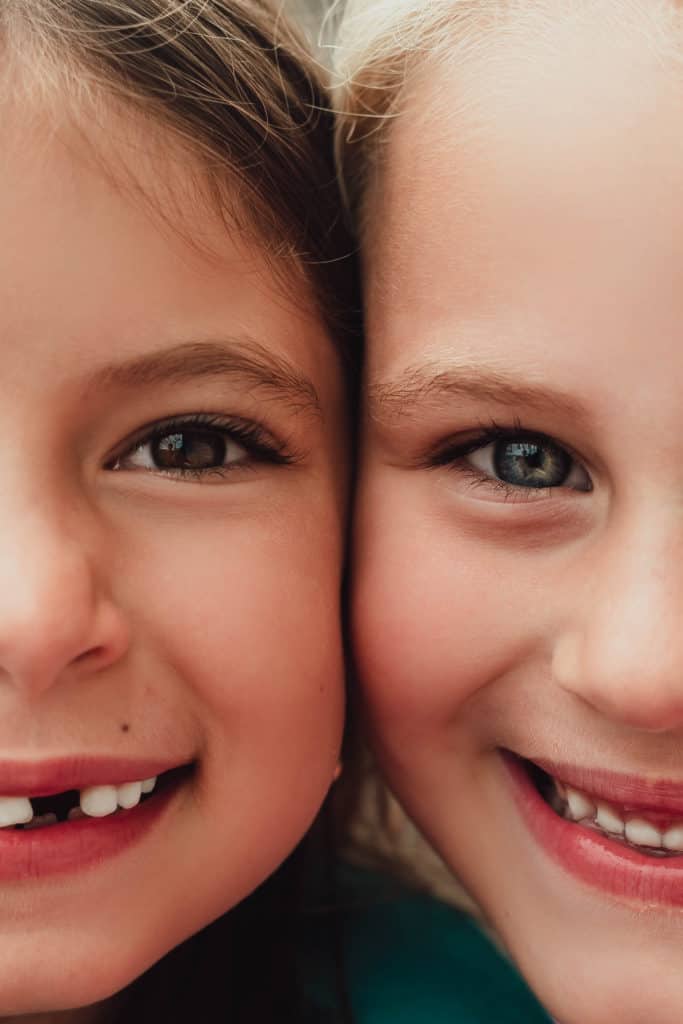
Cropped and Editied
Also, I make sure to increase the contrast and clarity. In Adobe Lightroom, I brighten up the whites of the eyes and darken the outside of the eyes, to add extra flare.
Final Thoughts
Try it out! Remember to focus on lighting, positioning, and your camera settings. Afterwards, a little editing can really at a stunning factor to the photo.
If you are like me, I actually have a 5th category called “bribery”, because my kids will not participate unless I bribe them.
Print this guide as a reminder, and subscribe for access to all the Simply Snapping Mom Free Guides!
If you found this helpful, share it!